Configure which Confluence groups can access pages at each classification level.
Navigate to Confluence Settings → Classification Levels Management → Level Permissions tab
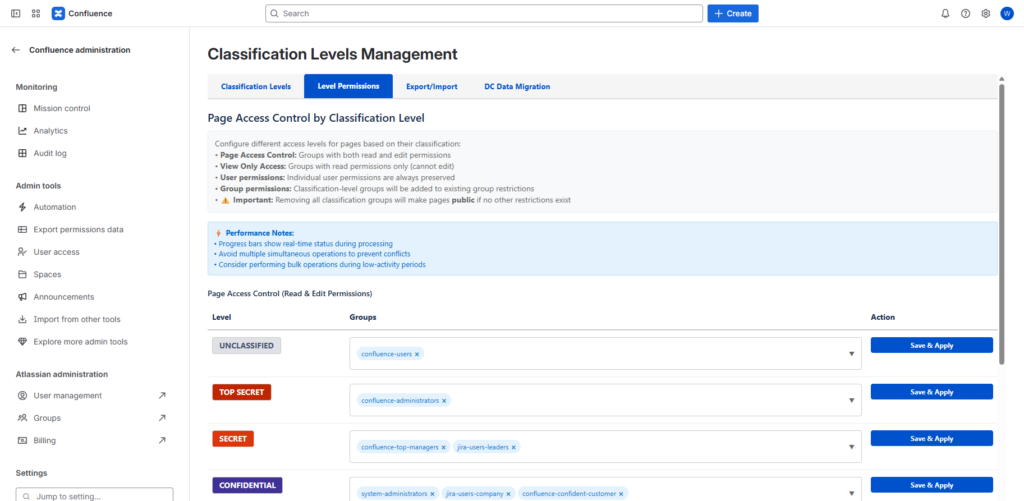
How it works: When you assign groups to a classification level, the app automatically applies Confluence page restrictions to all pages with that classification.
For each classification level, you can configure two types of access:
- Edit Groups – Can edit and modify pages
- Full access to page content
- Can change classification levels
- Can edit page properties
- View Groups – Read-only access
- Can view page content
- Cannot edit or modify
- Cannot change classification
Steps:
- Select a classification level from the dropdown
- In the Edit Groups field, type and select Confluence groups
- In the View Groups field, type and select Confluence groups
- Click Save to apply the permissions
- The app will automatically update page restrictions for all pages with that classification level
Important Notes:
- Groups must exist in Confluence before you can assign them
- Changes apply immediately to all pages with that classification
- Previous manual restrictions on pages may be overridden
- Users need to be members of the specified groups to access classified pages
Best Practice:
- Create dedicated groups for each classification level (e.g.,
secret-edit,secret-view) - Use descriptive group names that clearly indicate their purpose
- Regularly audit group memberships to ensure appropriate access
- Test permission changes with different user accounts